Don’t dig your dandelions. Consider leaving any dandelions alone this fall. We have a nice lawn, and only a few dandelions – we’ve been practicing Edible IPM (Integrated Pest Management) for years. We don’t spray or use anything on our lawn, which means we can eat the early spring dandelion leaves. They are delicious in salads, and also in soup. We’ve eaten so many that we hardly have any in the Spring, and I do miss them! Much cheaper and tastier than burying the large leaves in the grocery store.
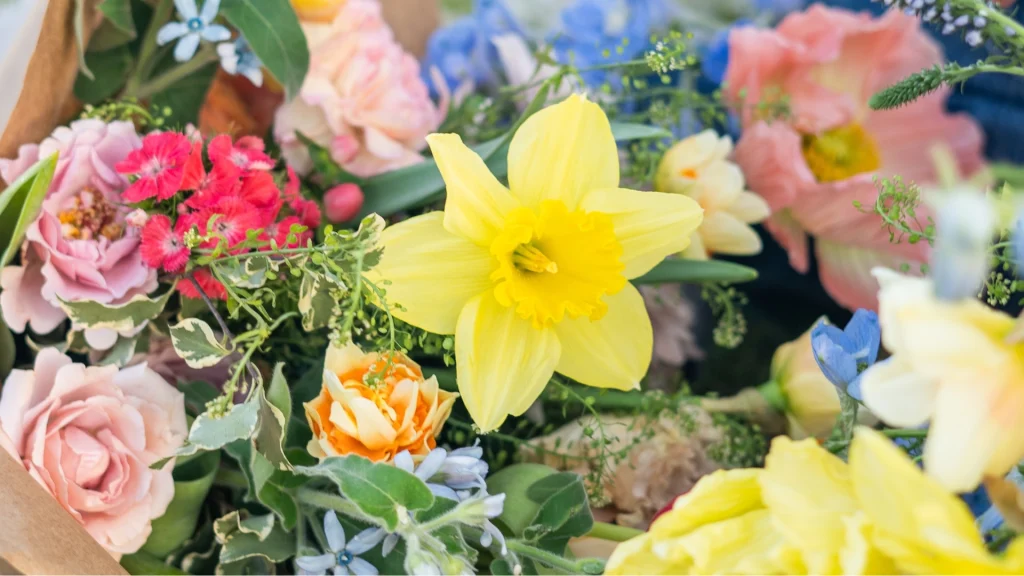
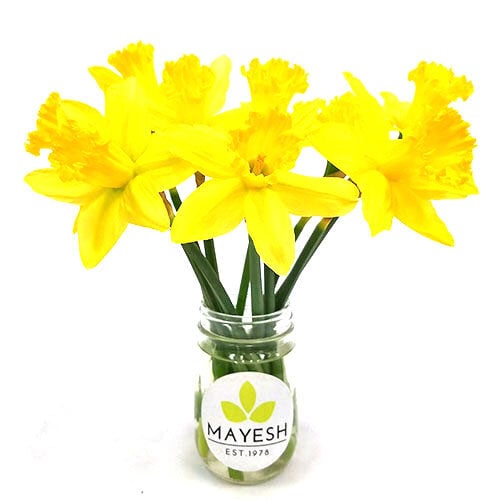
Spring brings an undeniable energy to floral design, and few flowers embody that seasonal shift like daffodils. Their bright, cheerful faces are a must-have for floral professionals, adding instant warmth and vibrancy to any arrangement. After reviewing the Mayesh Flower Library, I compiled a collection of daffodil varieties of all shapes, sizes, petal counts, and colors. Whether designing wedding florals, event installations, or seasonal retail arrangements, I hope this breakdown will help you choose the right daffodils for your arrangements!
Daffodils Belong in Every Florist’s Springtime Cooler
Daffodils, known botanically as narcissus, are versatile blooms that bring texture, movement, and a pop of color to any floral design. Their long vase life, sturdy stems, and seasonal appeal make them a must-have for spring arrangements. Available in classic trumpet, double, cupped, and tazetta forms, they offer a range of silhouettes and color palettes beyond bright yellow. Whether as focal flowers or delicate accents, daffodils add dimension, freshness, and a touch of spring nostalgia.
You might say, “HEY! Where are the paperwhites?!” once you get to the end of this list.
Fun fact: Daffodils are a specific type of narcissus, but NOT all narcissus flowers are daffodils. Let me explain: all daffodils belong to the narcissus genus, which includes a variety of flowers, such as daffodils, jonquils, and paperwhites. Daffodils typically have a large, trumpet-shaped corona, while other narcissus species may have smaller cups, multiple blooms per stem, or different growth habits. With over 40+ daffodil varieties featured below, we think you’re well covered, even without paperwhites!
Daffodil Abba White/YellowShape: Modified Tazetta VaseLife: 5-7 days PetalCount: 6 per bloom Description: A striking variety with bright white petals and a deep golden-yellow trumpet.
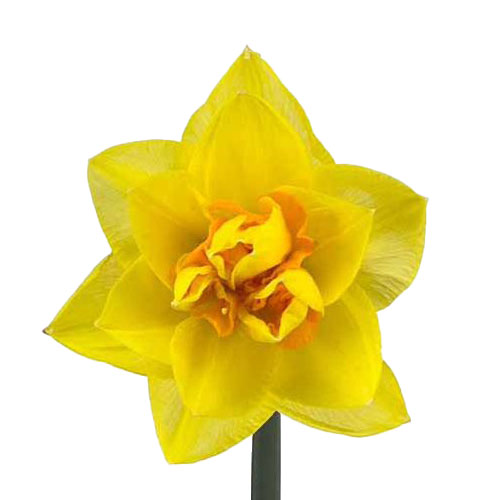
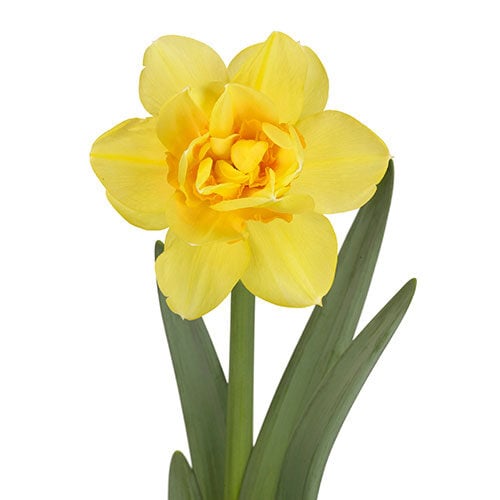
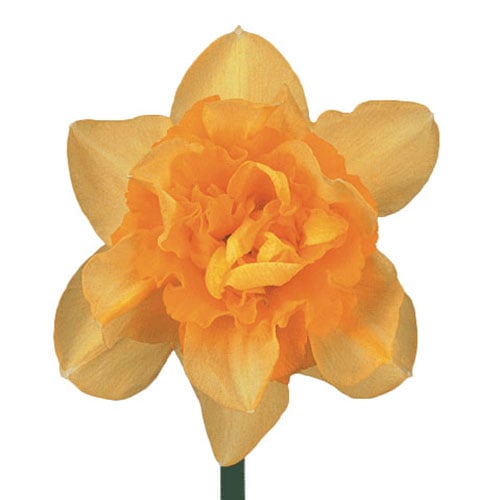
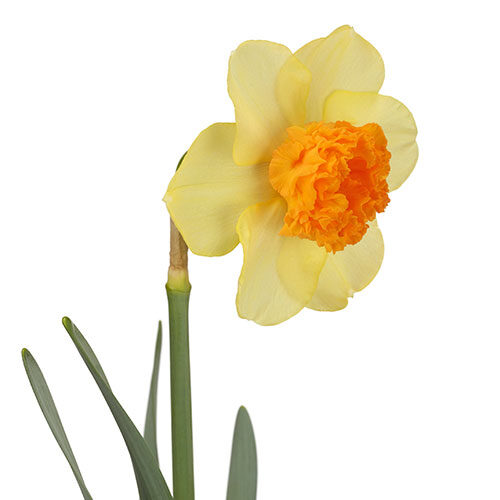
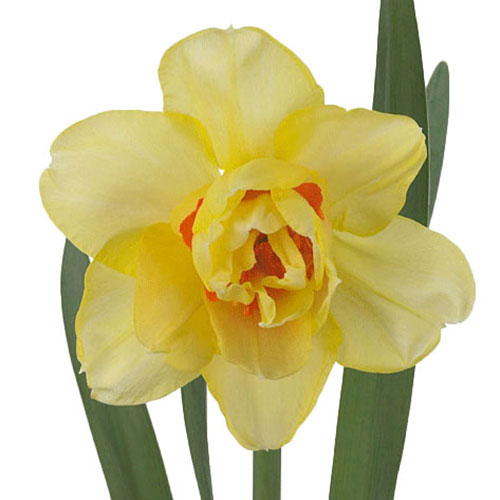
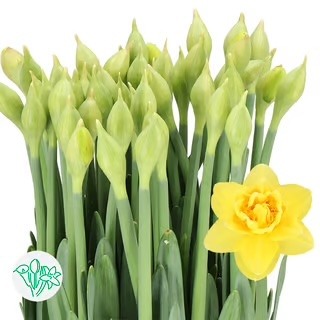
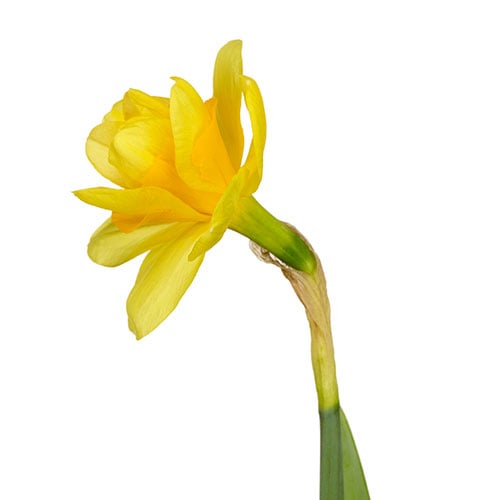
Daffodil Apotheose YellowShape: Double Vase Life: 5-7 days Petal Count: 6 per bloom Description: A vibrant yellow daffodil with a classic trumpet shape and slightly ruffled edges, adding a cheerful touch to any arrangement.
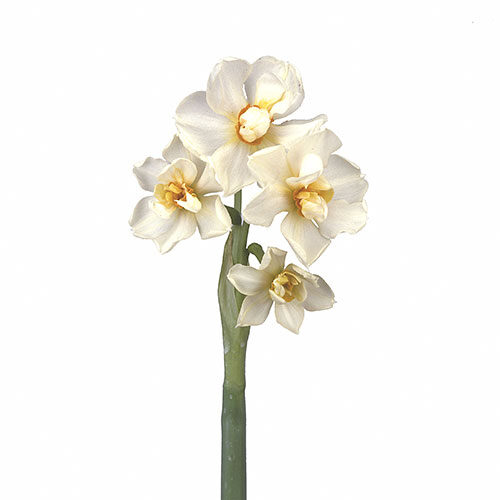
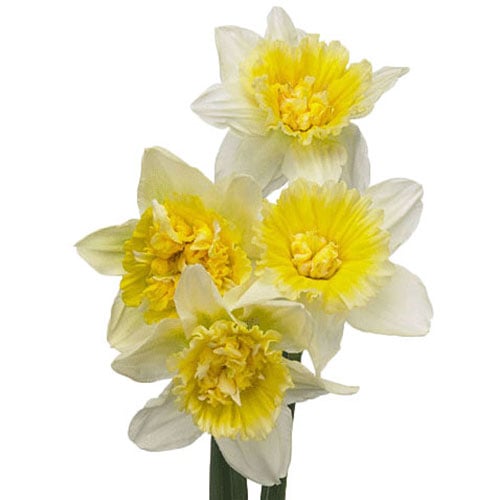
Daffodil Avalanche CreamShape: Tazetta (Cluster-Flowered) Vase Life: 5-7 days Petal Count: 6 per bloom Description: A multi-flowered daffodil produces 5-7 small creamy-white blooms per stem, each with a soft yellow cup.
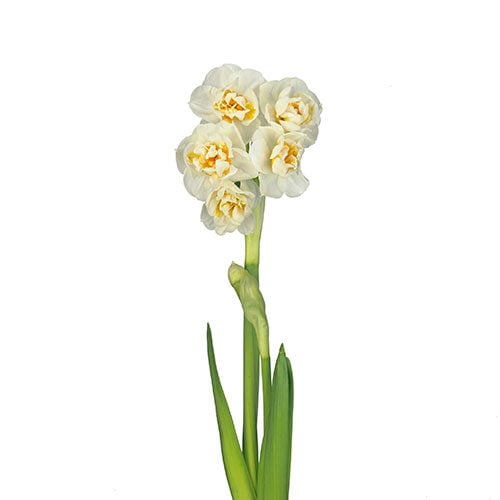
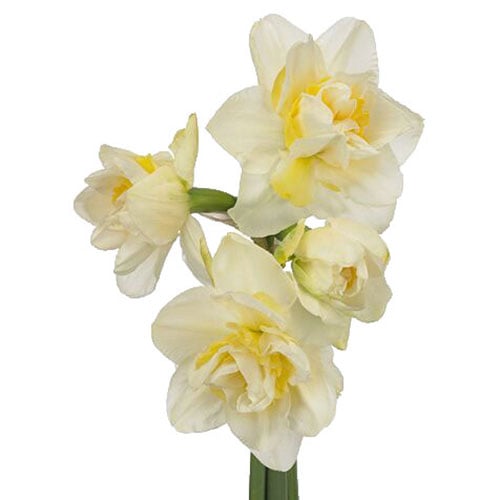
Daffodil Bridal Crown WhiteShape: Modified Tazetta (Cluster-Flowered) Vase Life: 7-10 days Petal Count: 12+ per bloom Description: A double-flowered daffodil with clusters of creamy-white blooms and soft golden centers, known for its intense fragrance and elegant, ruffled petals.
Daffodil Bright Paradise YellowShape: Double Vase Life: 5-7 days Petal Count: 12+ per bloom Description: A double-flowered daffodil with layers of golden-yellow petals and a textured, ruffled center, adding volume and vibrancy.
Daffodil Carlton YellowShape: Classic Trumpet Vase Life: 5-7 days PetalCount: 6 per bloom Description: A classic yellow daffodil with soft golden petals surrounding a large, frilly, deep-yellow cup.
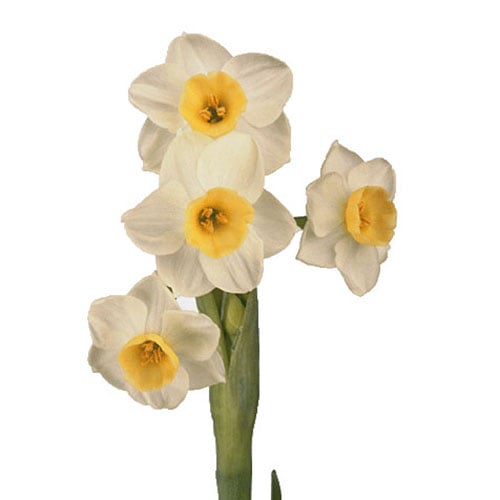
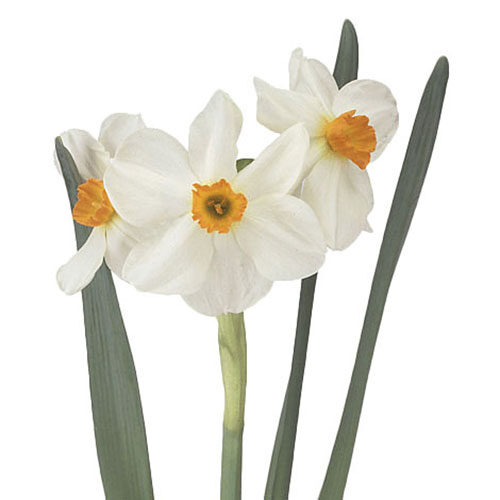
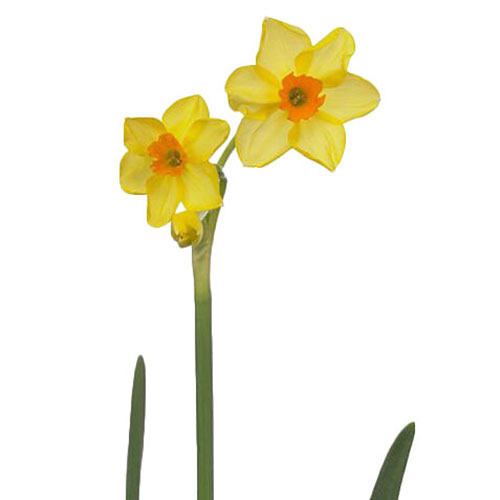
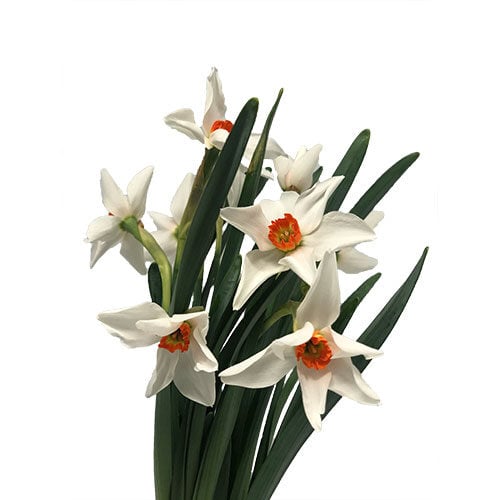
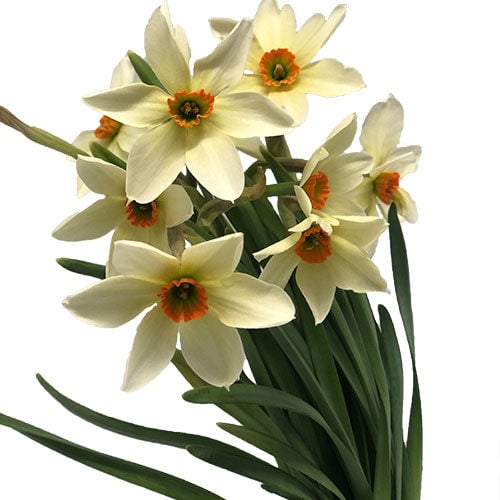
Daffodil Cragford YellowShape: Tazetta (Cluster-Flowered) Vase Life: 5-7 days Petal Count: 6 per bloom Description: A multi-flowered daffodil producing up to six blooms per stem, with pure white petals and a small, vibrant orange cup.
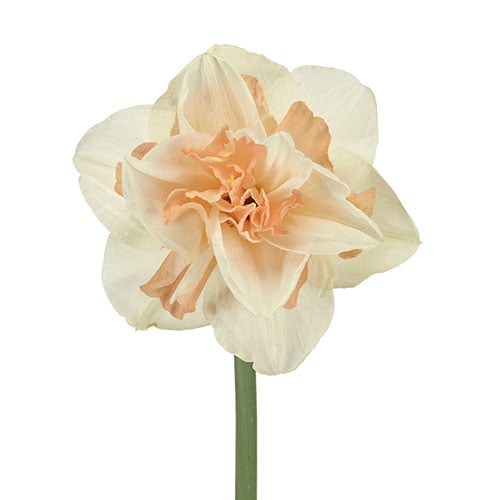
Daffodil Delnashaugh Cream/PeachShape: Double VaseLife: 5-6 days PetalCount: 12+ per bloom Description: A luxurious double daffodil with creamy white outer petals and a soft peach-hued ruffled center, resembling a delicate rose.
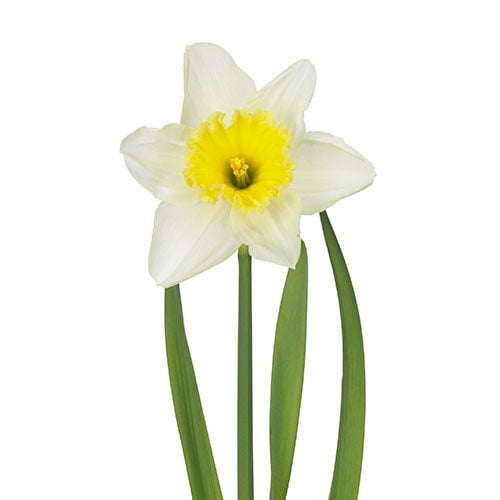
Daffodil Delta White/YellowShape: Cup VaseLife: 5-7 days PetalCount: 6 per bloom Description: A bold bi-color daffodil with white outer petals and a large, ruffled yellow trumpet.
Daffodil Dick Wilden YellowShape: Double VaseLife: 5-6 days PetalCount: 12+ per bloom Description: A classic double daffodil with layers of golden-yellow petals surrounding a frilly, ruffled cup. Its full, showy blooms adds richness and texture.
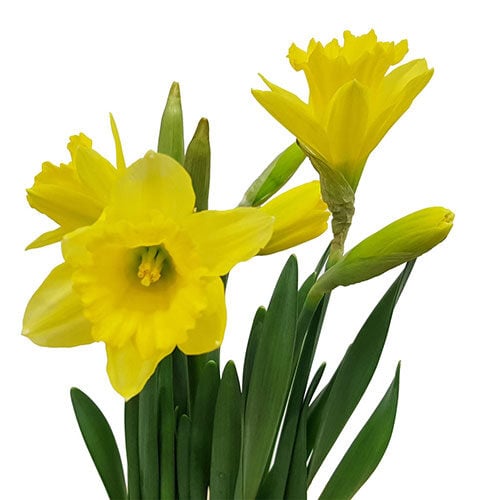
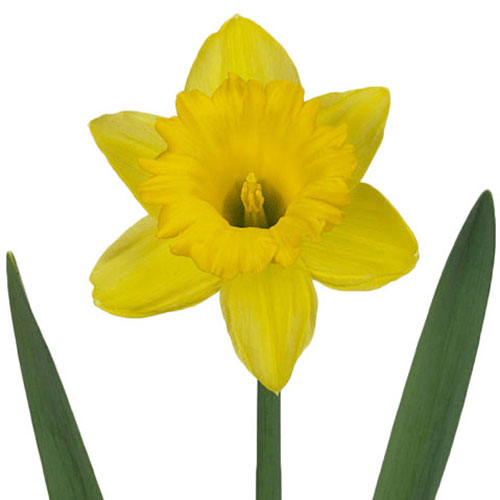
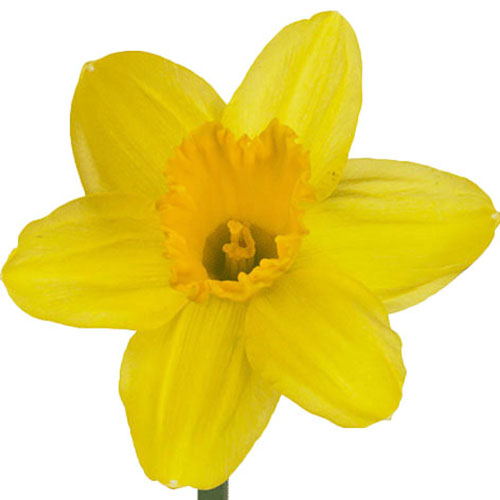
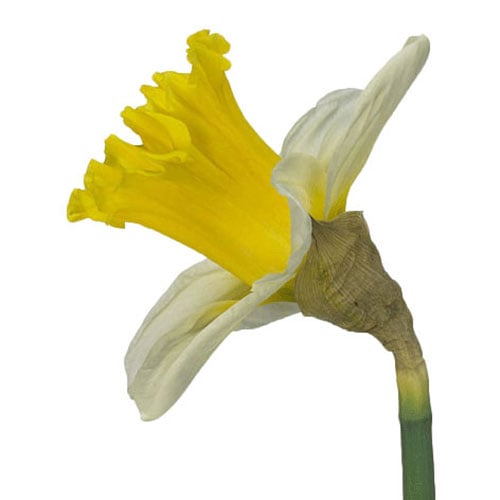
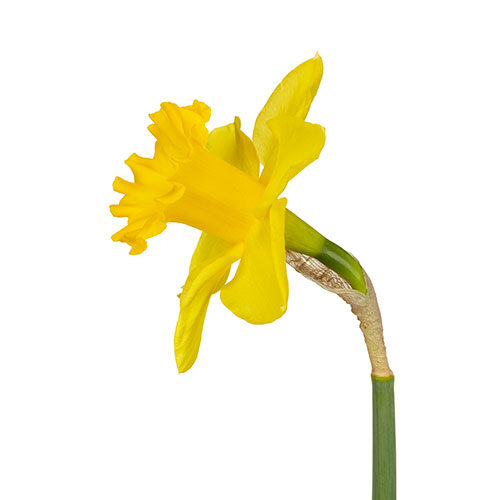
Daffodil Dutch Master YellowShape: Trumpet VaseLife: 5-7 days PetalCount: 6 per bloom Description: A classic trumpet daffodil with large, golden-yellow blooms. Its sturdy stems and bold color make it a top choice for floral arrangements.
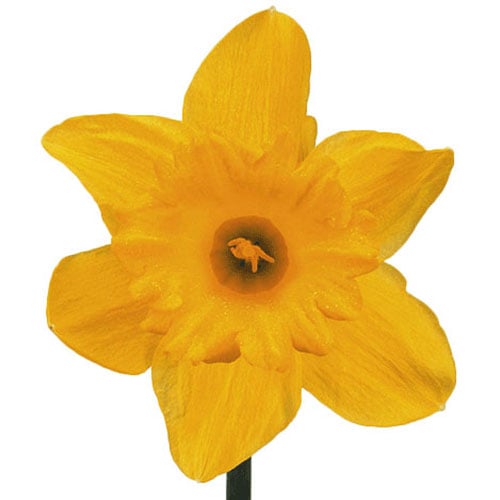
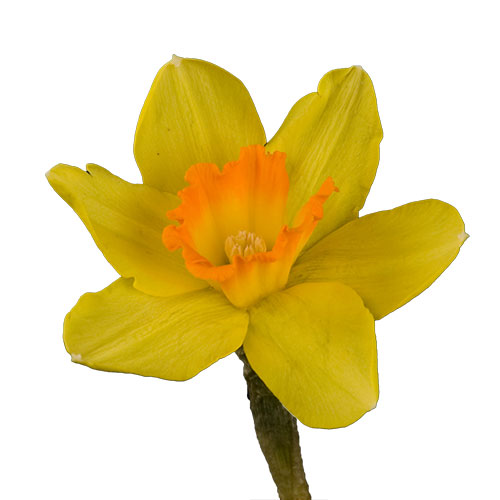
Daffodil Fortune YellowShape: Trumpet VaseLife: 5-7 days PetalCount: 6 per bloom Description: Striking contrast with bold two-tone daffodils with golden-yellow petals and an orange-rimmed cup.
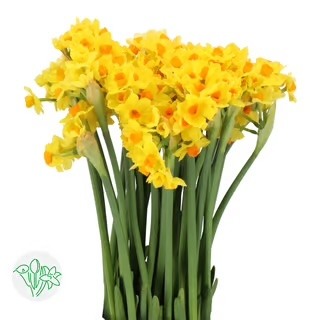
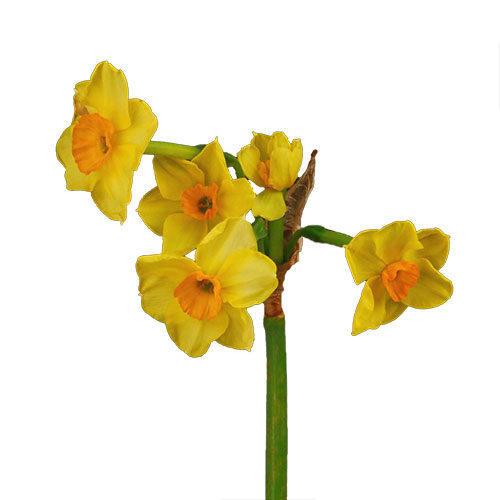
Daffodil Grand Soleil DorShape: Tazetta (Cluster-Flowered) VaseLife: 7-10 days PetalCount: 6 per bloom Description: A multi-flowered tazetta daffodil with clusters of golden-yellow blooms and deep orange cups.
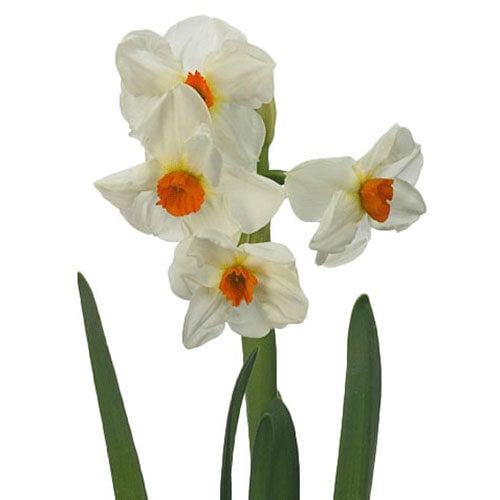
Daffodil Geranium White/YellowShape: Tazetta (Cluster-Flowered) Vase Life: 7-10 days Petal Count: 6 per bloom Description: A multi-flowered tazetta daffodil that produces 2-6 small, creamy-white blooms per stem, each featuring a bright orange cup.
Daffodil Gigantic Star YellowShape: Trumpet VaseLife: 5-7 days PetalCount: 6 per bloom Description: A giant yellow daffodil with broad, overlapping petals and a large, open-faced trumpet.
Daffodil Golden Harvest YellowShape: Trumpet VaseLife: 5-7 days PetalCount: 6 per bloom Description: A classic trumpet daffodil with bold, golden-yellow petals and a slightly ruffled trumpet with a strong stem.
Daffodil Ice Follies CreamShape: Trumpet VaseLife: 5-7 days PetalCount: 6 per bloom Description: A large-cupped daffodil with silvery-white petals and a broad, flattened lemon-yellow cup that fades to creamy white as it matures.
Daffodil Ice King Pale YellowShape: Double VaseLife: 5-6 days PetalCount: +12 per bloom Description: A double-flowered daffodil with layers of creamy, frilled yellow center, creating a full, ruffled appearance.
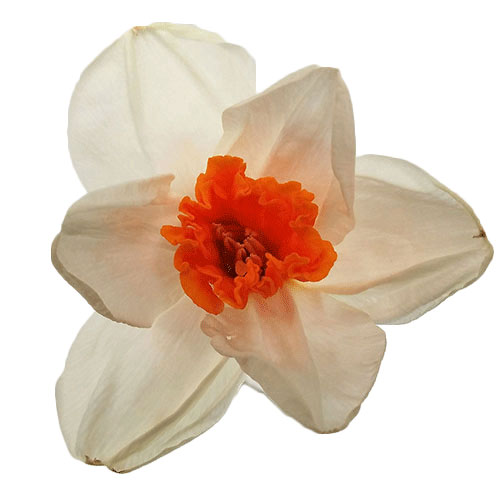
Daffodil Johann Strauss Cream/OrangeShape: Large-Cupped VaseLife: 5-7 days PetalCount: 6 per bloom Description: Has creamy petals and a rich, orange-rimmed cup.
Daffodil Las Vegas White/YellowShape: Trumpet Vase Life: 5-7 days Petal Count: 6 per bloom Description: A striking bi-color daffodil with a large, frilly lemon-yellow trumpet and creamy white petals.
Daffodil Martinette Yellow/OrangeShape: Tazetta (Cluster-Flowered) VaseLife: 7-10 days PetalCount: 6 per bloom Description: A multi-flowered daffodil that produces several bright yellow blooms per stem, each with a bold orange cup.
Daffodil Modern Art Cream/OrangeShape: Large Double Cup Vase Life: 5-7 days Petal Count: 6 per bloom Description: A ruffled, double daffodil with creamy outer petals and an apricot-orange center.
Daffodil Pencil YellowShape: Trumpet Vase Life: 5-7 days Petal Count: 6 per bloom Description: A petite, slender daffodil with thin, delicate yellow petals and a small, darker trumpet.
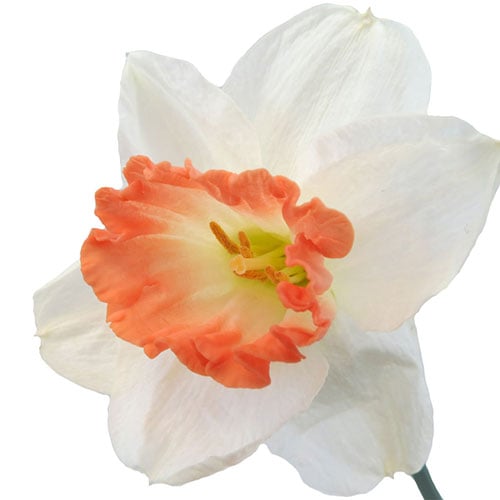
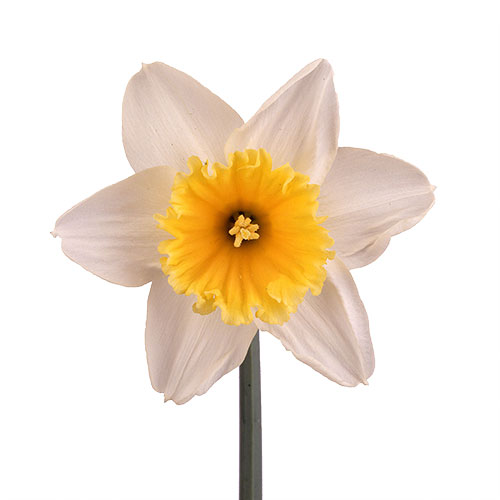
Daffodil Pink Charm Cream/PinkShape: Large-Cupped Vase Life: 5-7 days Petal Count: 6 per bloom Description: A striking bicolor daffodil with creamy-white petals and a frilly, soft pink cup.
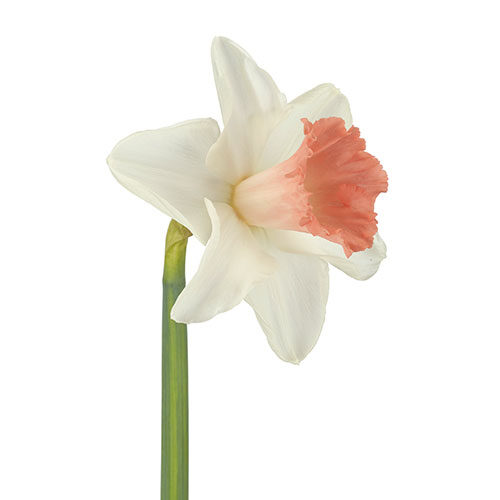
Daffodil Pink Perfection White/PinkShape: Trumpet Vase Life: 5-7 days Petal Count: 6 per bloom Description: A refined variety with white petals and a deep rose-pink trumpet. One of the truest pink daffodils available.
Daffodil Pinza Yellow/OrangeShape: Large-Cupped Vase Life: 5-7 days Petal Count: 6 per bloom Description: The large-cupped Pinza has a wide, deep orange band that fades to golden yellow at the base, surrounded by rich golden-yellow petals. Its slightly reflexed petals make it distinct from other daffodils.
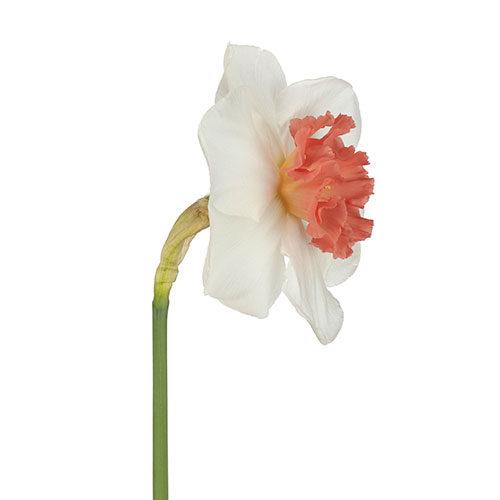
Daffodil Precocious White/PinkShape: Large-Cupped Vase Life: 5-7 days Petal Count: 6 per bloom Description: A striking large-cupped daffodil with creamy white petals and a vibrant pinkish-orange trumpet. The ruffled edges add extra texture and beauty.
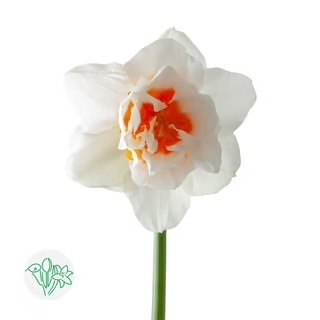
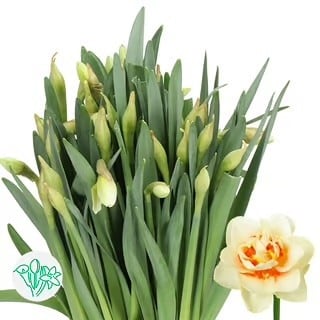
Daffodil Replete White/OrangeShape: Double Vase Life: 5-6 days Petal Count: 12+ per bloom Description: A lush double daffodil with layers of ruffled white petals and a coral-orange center, resembling a peony.
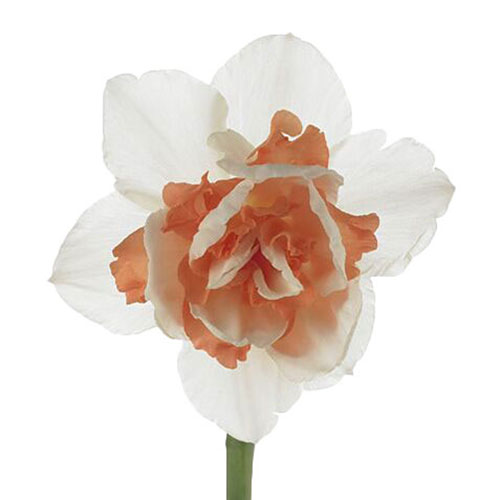
Daffodil Romantic Paradise Cream/OrangeShape: Double Vase Life: 5-6 days Petal Count: 12+ per bloom Description: A pastel-hued double daffodil with creamy outer petals and a gently ruffled apricot-orange cup.
Daffodil Royal Dutch YellowShape: Trumpet Vase Life: 5-7 days Petal Count: 6 per bloom Description: A bright golden-yellow trumpet daffodil with strong stems.
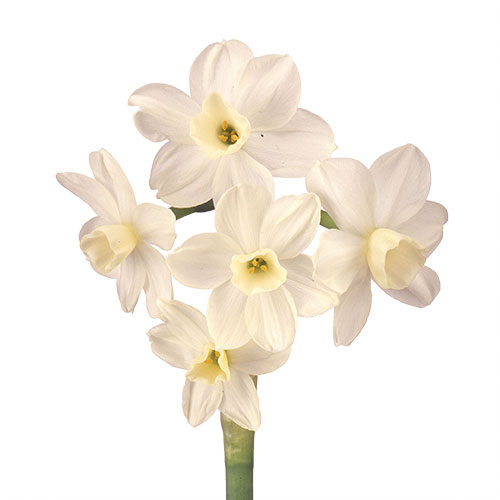
Daffodil Silver Chimes WhiteShape: Tazetta (Cluster-Flowered) Vase Life: 7-10 days Petal Count: 6 per bloom Description: A tazetta daffodil with multiple small, pure white flowers per stem and a tiny yellow cup.
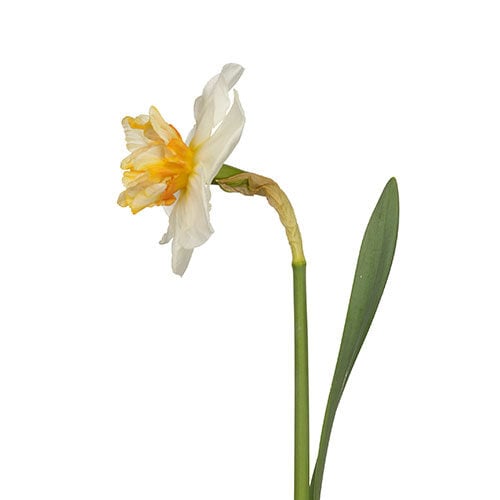
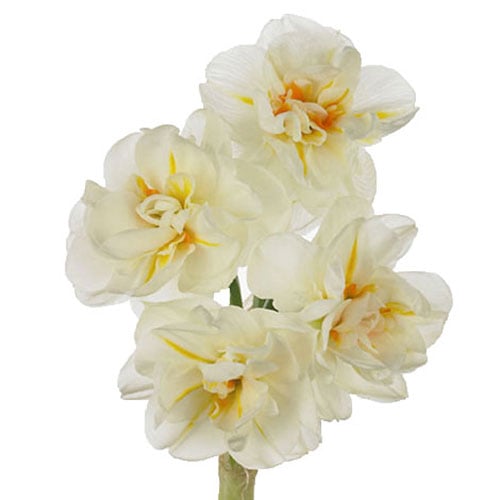
Daffodil Sir Winston Churchill WhiteShape: Double Tazetta (Cluster-Flowered) Vase Life: 5-6 days Petal Count: 12-18 per bloom (double-layered) Description: A double-petaled tazetta daffodil with clusters of 3-5 exquisite white blooms per stem, flecked with hints of orange-yellow in the center.
Daffodil Slim Whitman White/YellowShape: Trumpet Vase Life: 5-7 days Petal Count: 6 per bloom Description: A unique bi-color daffodil with crisp white petals and a vibrant yellow trumpet with a slender stem.
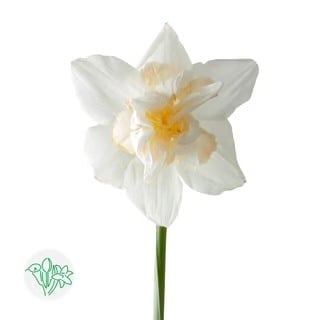
Daffodil Snow Paradise WhiteShape: Double VaseLife: 5-6 days Petal Count: 12-20 Description: A pristine white double daffodil with elegant, slightly ruffled petals and a soft yellow center.
Daffodil Sweet ParadiseShape: Double Vase Life: 5-6 days Petal Count: 12-18 Description: A lush double daffodil with creamy white petals and a ruffled peachy-orange center. Its full blooms and delicate fragrance make it a standout in floral arrangements.
Daffodil Sole D’or YellowShape: Tazetta (Cluster-Flowered) Vase Life: 7-10 days Petal Count: 6 per bloom Description: A multi-flowered tazetta daffodil with 10-20 bright yellow blooms per stem, each surrounding a rich orange cup.
Daffodil Tahiti Yellow/OrangeShape: Double Vase Life: 5-6 days Petal Count: 12-18 per bloom Description: A striking double daffodil with golden-yellow outer petals and bold orange-red ruffled inner petals.
Daffodil VenetoShape: Double Vase Life: 5-6 days Petal Count: 12-18 per bloom Description: A vibrant double daffodil featuring golden-yellow outer petals and a rich, ruffled center in a deeper yellow hue. Its full, textured blooms add volume and depth.
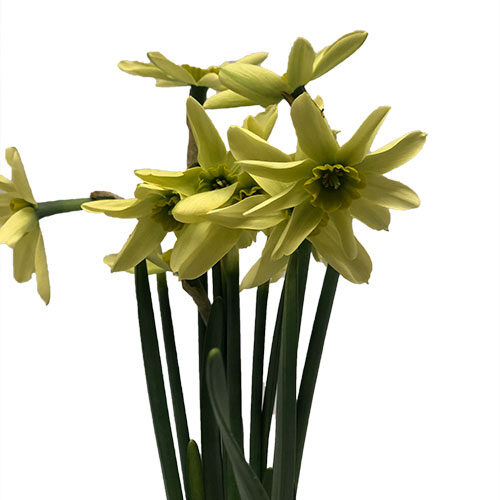
Daffodil Viridiflora Green Light GreenShape: Small Cup Vase Life: 5-7 days Petal Count: 6 per bloom Description: A rare and exotic daffodil with creamy soft green petals.
Daffodil Viridiflora Green Orange White/OrangeShape: Small Cup Vase Life: 5-7 days Petal Count: 6 per bloom Description: A refined daffodil variety with crisp white petals and a bold orange center.
Daffodil Viridiflora Lemon Orange Cream/OrangeShape: Small Cup Vase Life: 5-7 days Petal Count: 6 per bloom Description: A distinctive daffodil with lemon-yellow petals and a creamy apricot-orange trumpet.
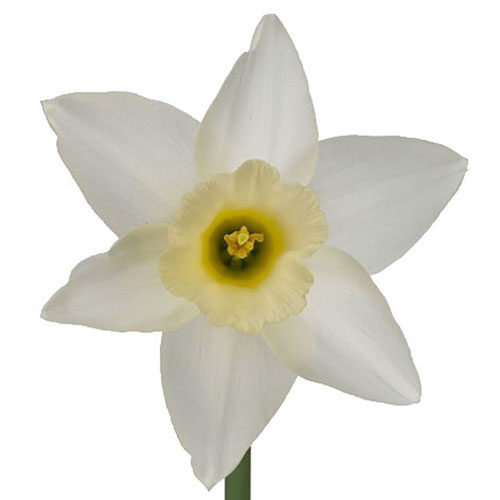
Daffodil Wedding Bell WhiteShape: Trumpet Vase Life: 5-7 days Petal Count: 6 per bloom Description: An elegant white daffodil with gently ruffled petals and a soft yellow trumpet. A popular choice for wedding bouquets and spring arrangements.
Daffodil White Lion CreamShape: Double Vase Life: 5-6 days Petal Count: Multiple layers per bloom Description: A romantic double daffodil with layers of creamy white petals and subtle hints of soft yellow in the center.
Daffodil Yellow Paradise YellowShape: Double Vase Life: 5-6 days Petal Count: 12-18 per bloom Description: A vibrant, deep yellow double daffodil with a slightly ruffled edge. Its full, layered petals add texture and brightness to floral designs.
How to Properly Add Daffodils to an Arrangement with Their Toxic Sap
Daffodils release a toxic, gooey sap when their stems are cut, which can shorten the lifespan of other flowers in mixed arrangements. However, with proper conditioning, you can safely use them alongside other blooms. Follow these steps to prepare daffodils for floral designs:
Condition Daffodils Separately– After cutting the stems, place daffodils in a separate container of clean, lukewarm water for at least 2-4 hours (ideally overnight). This allows them to release most of their sap before being added to an arrangement.
Do Not Recut Stems When Mixing with Other Flowers– Once conditioned, do not recut daffodil stems when adding them to a mixed arrangement. Cutting the stems again will cause them to release fresh sap, which can harm other flowers.
Keep Water Fresh– Daffodils should ideally be placed in a separate vase if possible. If mixing with other flowers, change the water daily to minimize sap buildup.
**Note: Daffodil sap is not typically toxic to humans. However, we recommend using gloves when working with these flowers, as the sap can cause skin irritation. The sap daffodils seep out after cutting is only detrimentally toxic to other flowers.
Best Flowers to Pair with Daffodils
Some flowers are more tolerant of daffodil sap, such as:
Daffodils aren’t just a seasonal staple—they’re a floral powerhouse that deserves a prime spot in every florist’s spring lineup. With this image-rich breakdown, you can confidently choose the perfect daffodils for any event, retail order, or custom floral piece.
Need fresh daffodils for your next order?
Connect with your local Mayesh branch or shop online for the best seasonal selection.
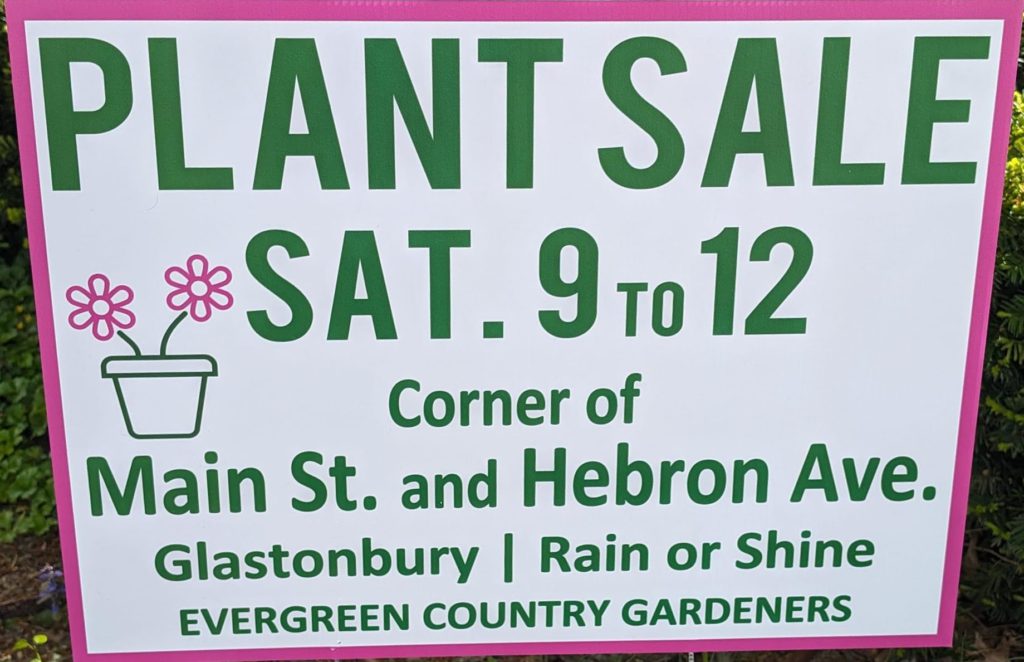
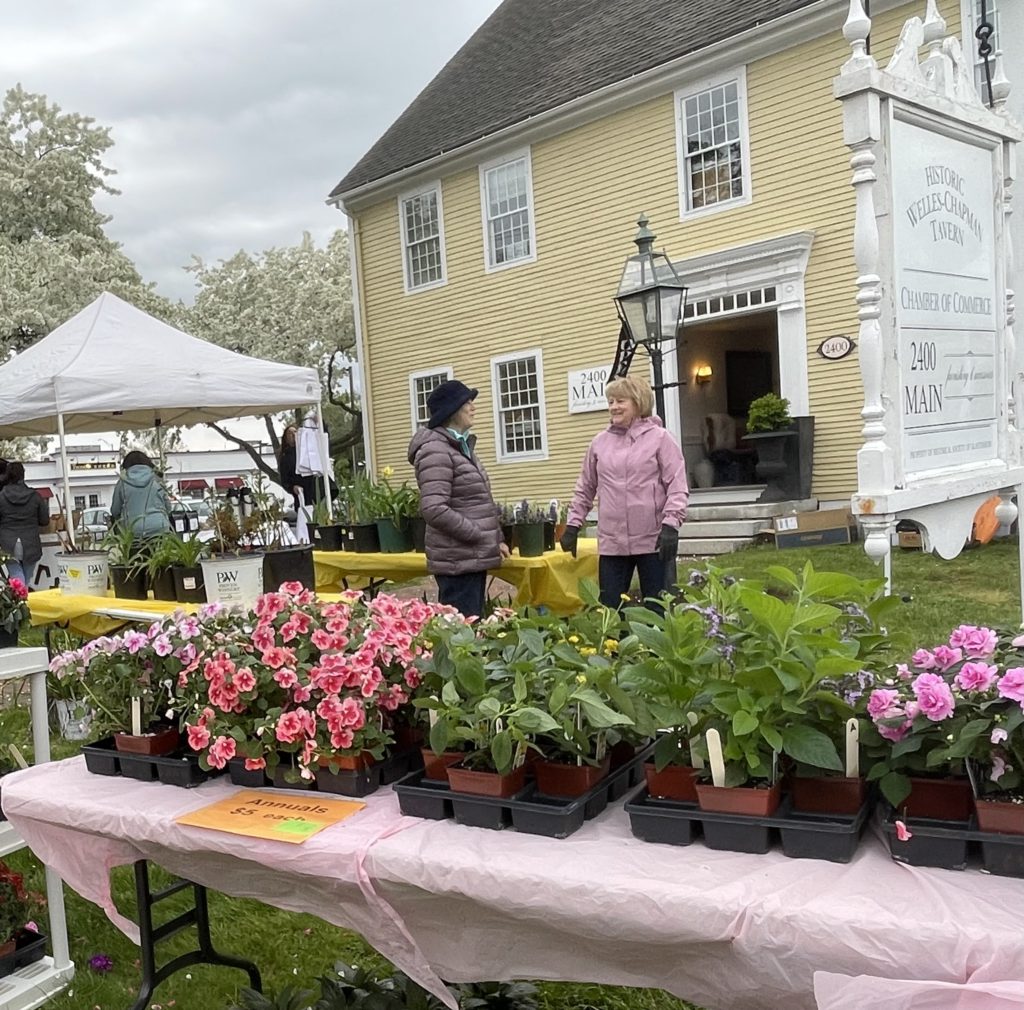
Excited for our 2025 Plant Sale this weekend! We’ve dug perennials from our gardens, and arranged to pick up a trailerful of annuals from Draghi’s Farm Stand and will have our garden tool sharpening station! Hope the weather is nice!
Our 2023 – 2024 Season ended with our Annual Dinner at A Villa Louisa where our new board was sworn in by Polly Brooks (Former President of the FGCCT). Suzie Hoyt of Glastonbury Garden Club hosted us for a wonderful tour of her beautiful gardens prior to the Annual Dinner
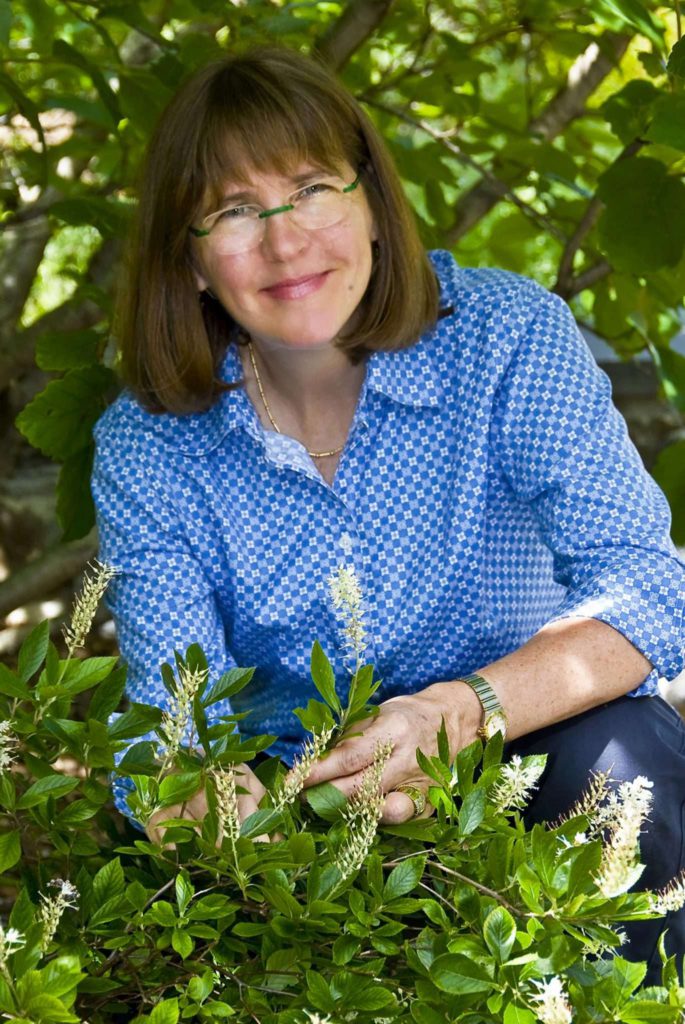
The Glastonbury Council of Garden Clubs is hosting Kim Eierman, (sounds like Fireman) at the South Glastonbury Congregational Church (949 Main Street, S. Glastonbury) on Monday, October 7 at 6:30 pm. Founder of EcoBeneficial LLC, Kim is an environmental horticulturist and ecological landscape designer specializing in native plants. Based in New York, Kim teaches at the New York Botanical Garden, Brooklyn Botanical Garden, The Native Plant Center, Rutgers Home Gardeners School and several other institutions.
Kim is an active speaker nationwide on many ecological landscape topics, presenting for industry conferences, sustainability events, corporate events, environmental organizations, and other groups interested in environmental improvements,
ECOBENEFICIAL LANDSCAPE STRATEGIES FOR THE CLIMATE CRISIS
Climate change is here and it is impacting our landscapes – increased flooding, more frequent droughts, more extreme weather events, longer growing seasons and increasing temperatures. Ecological mismatches, record loses of native species and an increase of invasive species are now the norm. Want to help fight climate change in any landscape? Learn how the plants you choose and the landscape practices you use can help reduce the impacts of climate change and improve the environment around you.
Our annual plant sale will be Saturday May 11th from 9:00 – 12:00. We’re working hard to reduce transmission of invasive Asian Jumping Worms in our plants by bare-rooting most of the plants dug from our yards. These worms deplete nutrients from the soil making it difficult for plants to thrive. We will have information on the problem as well as demonstrations illustrating the “bare-rooting” process.
Features
Bare-rooted plants from members gardens
Herb Garden Planters
Annuals from Draghi’s
Hanging Planters from Draghi’s – Great for Mother’s Day Gifts
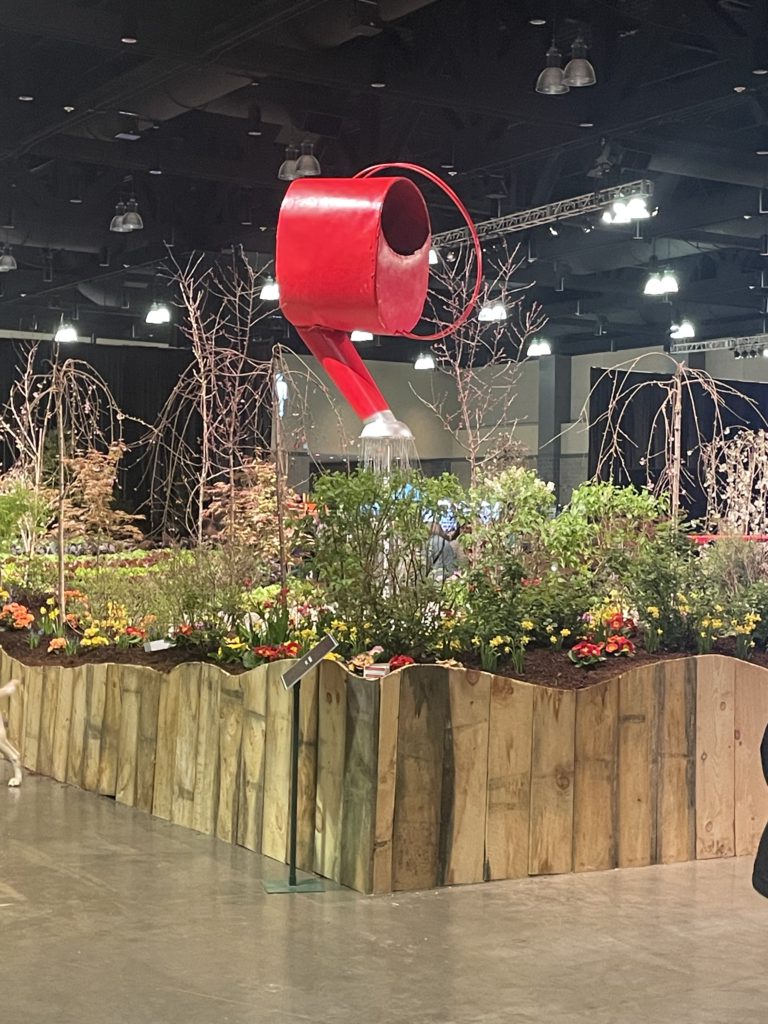
Evergreen Country Gardeners enjoyed the CT Flower and Garden Show – Bursting into Spring – which took place February 22-25 but many of us were at the Convention Center from the 20th – 25th! The following eight members members participated in the show as entrants and or volunteers.
Donna Nowak (President) – Show Schedule Chair, Design Entry
Kathy Harris – Botanical Arts – Photography Division Chair
Suzy Fisher – Quality Control Chair
Trish Manfredi – Table Entry
Carole Fromer – Design Division – Judges Clerk
Valerie Escalera – Design Division – Quality Control
Jim Oliphant – Botanical Arts Division – Photography – Judges Clerk, Photography Entrant
Shirley Jackson – Hospitality
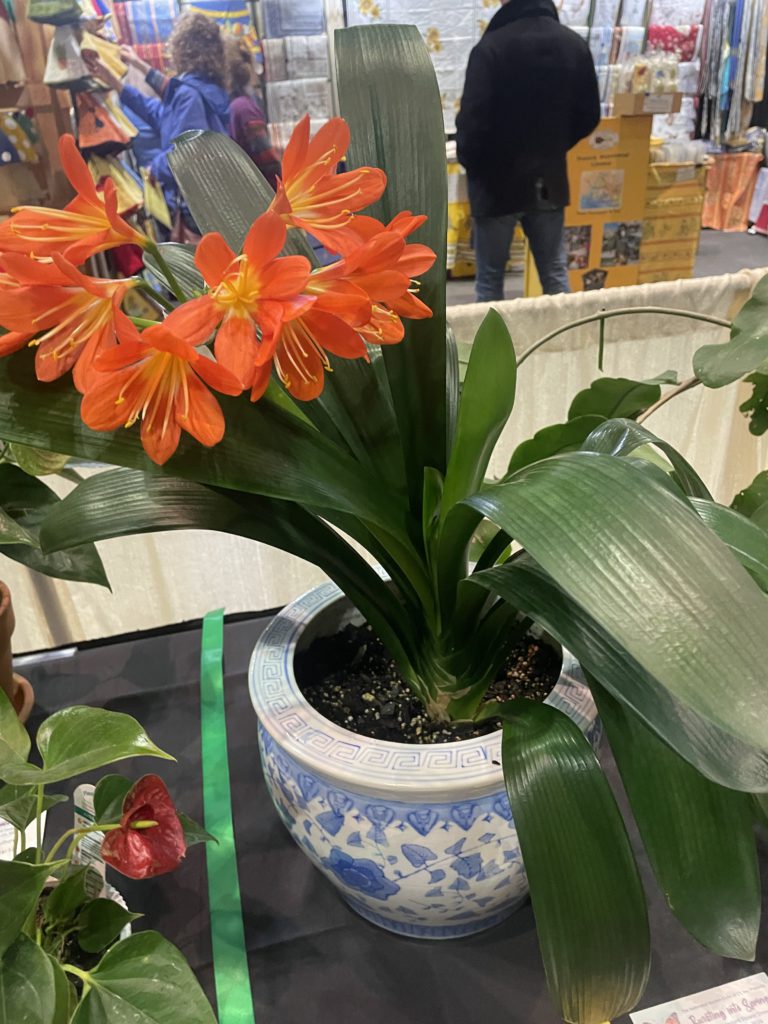
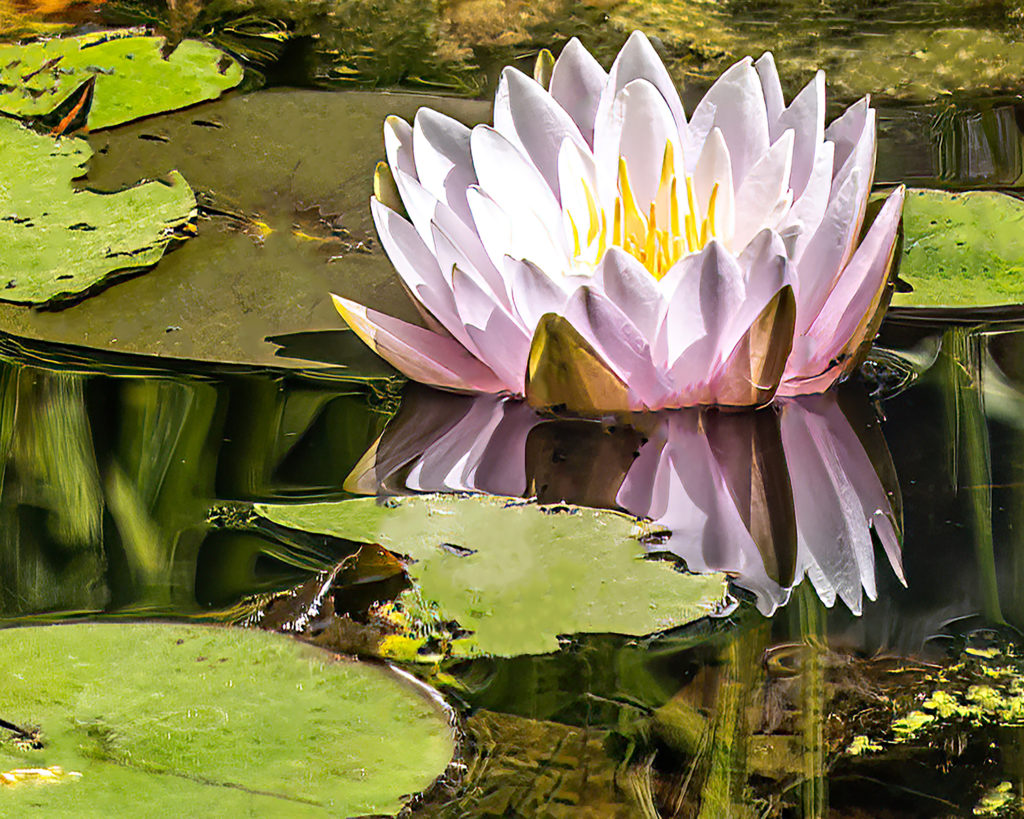
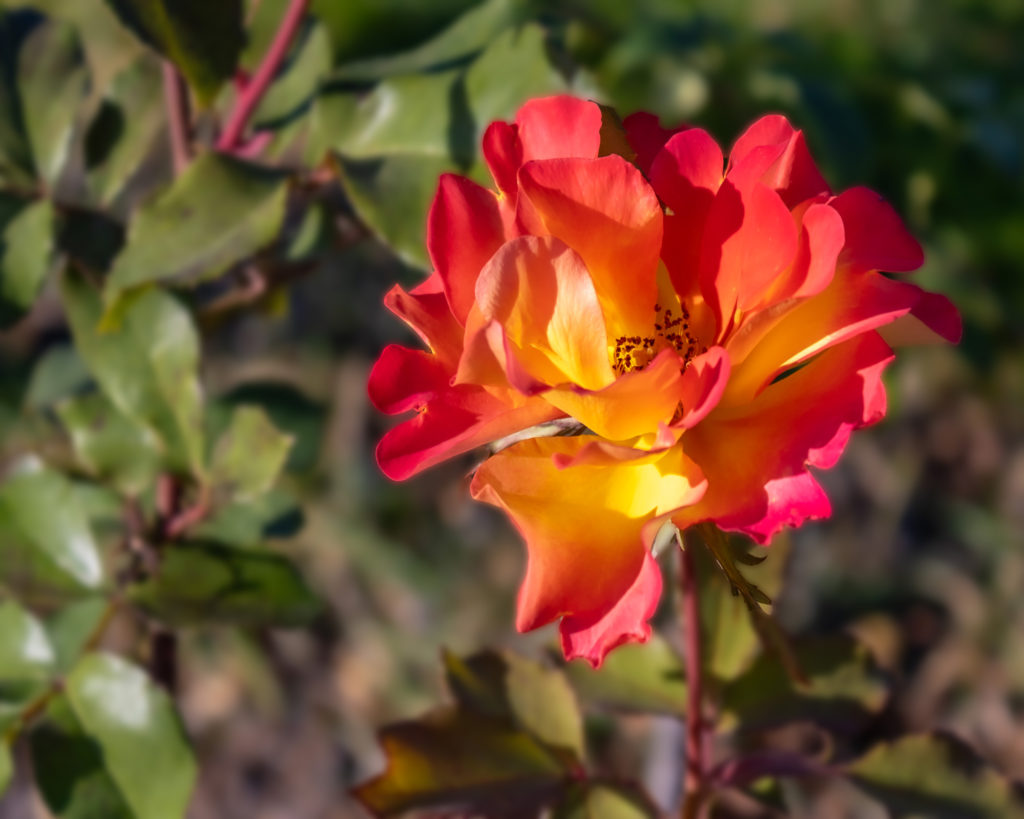
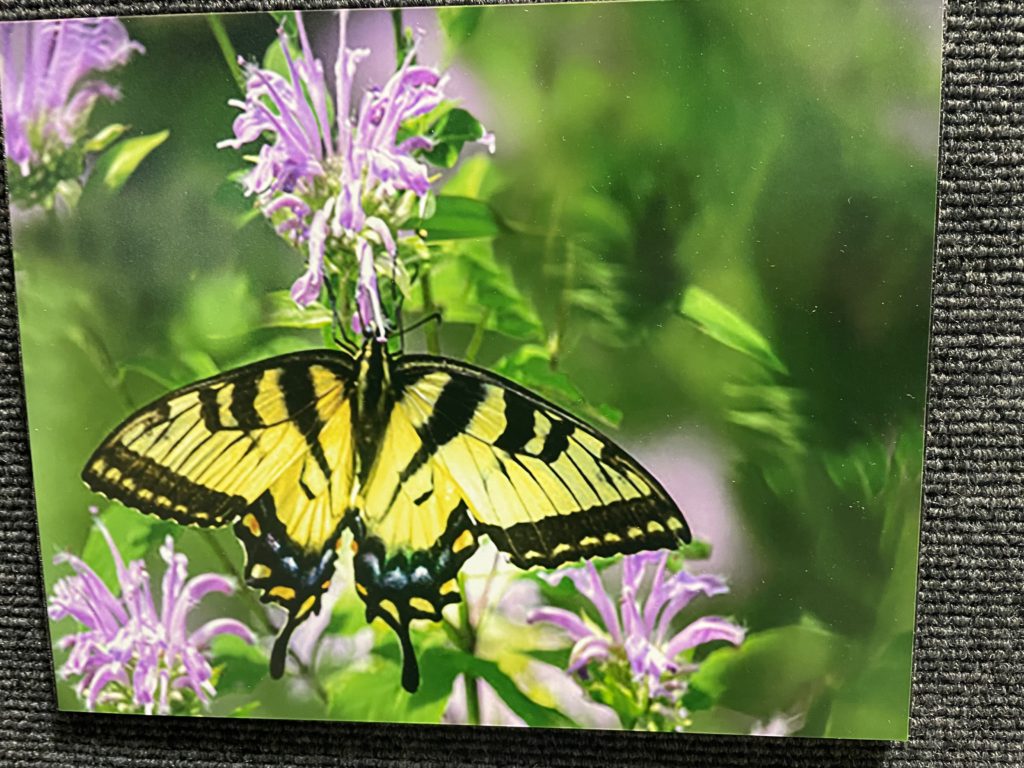
Landcape Design EntryKathy Harris – Hort Class 35 – 3rd PlaceJim Oliphant – Bringing Beauty to the PondJim Oliphant – Flaming GlowJim Oliphant – Swallowtail on Monarda – Jim Oliphant – Star of the Show2024 CT Flower Show
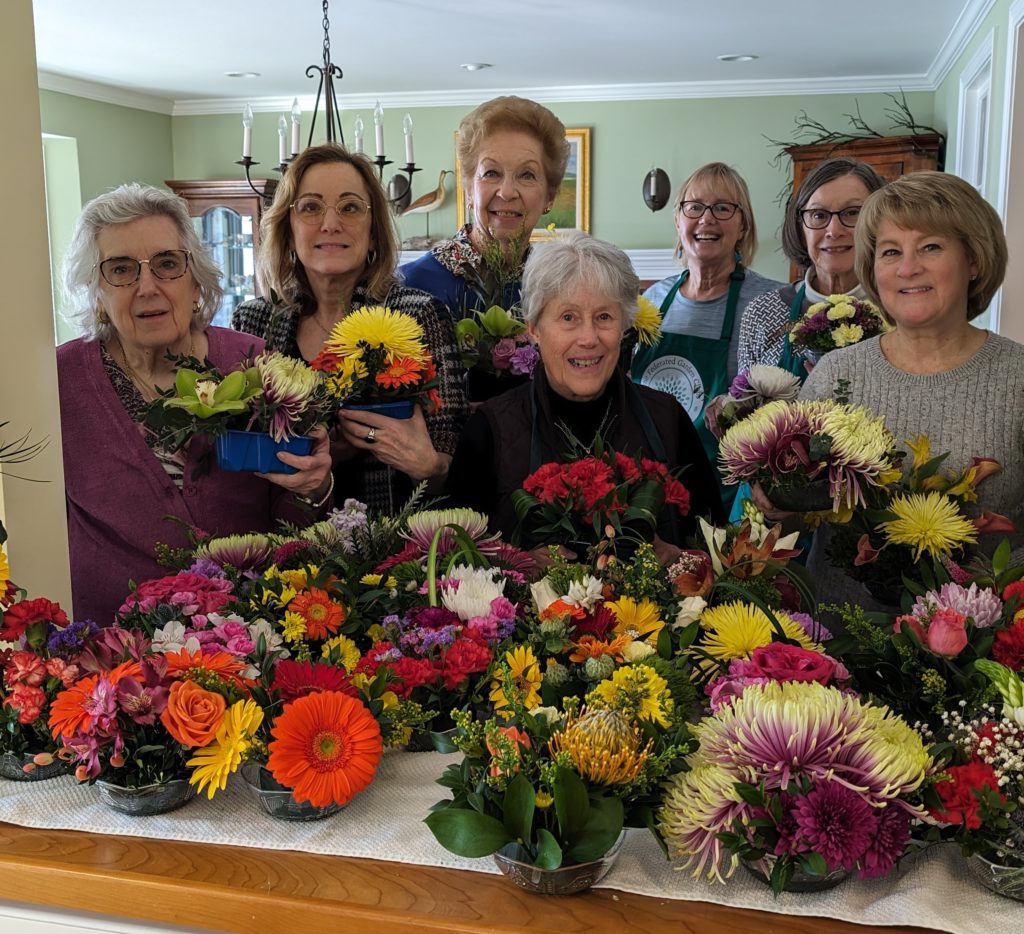
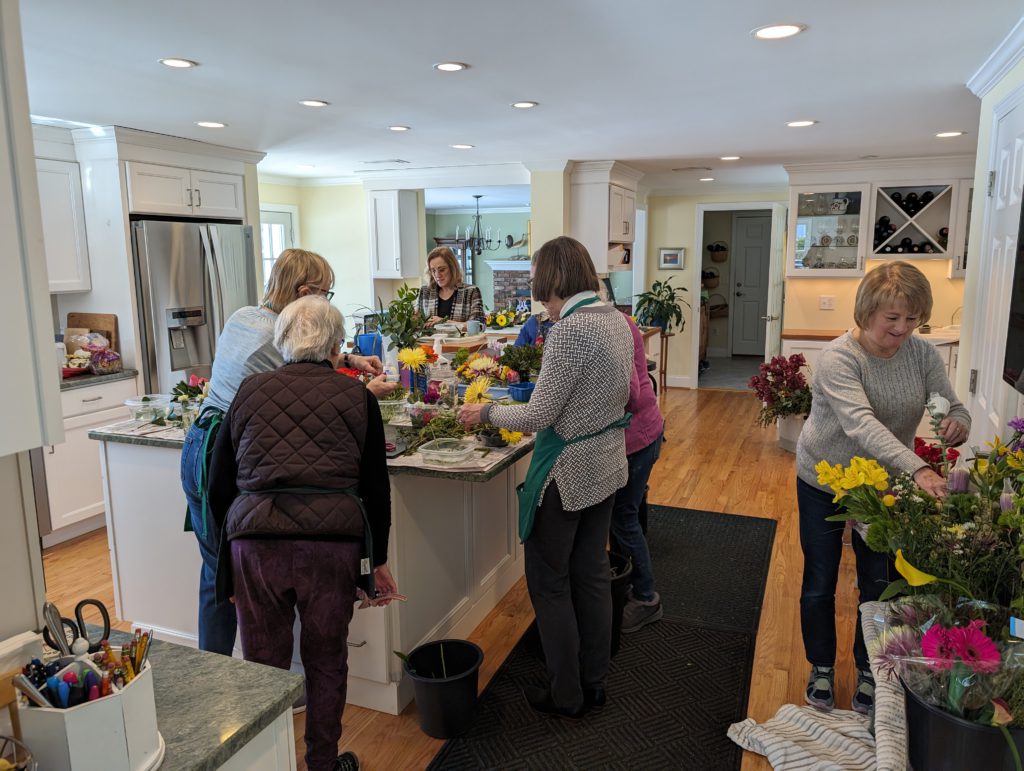
Members of Evergreen Country Gardeners in Glastonbury gathered recently to make 33 floral arrangements for Welles-Turner Library and area nursing homes and shut-ins using leftover flowers from The Federated Garden Clubs of CT’s standard flower show held in conjunction with the annual CT Garden and Flower Show, held this year Feb 22-25. The show is held at the CT Convention Center in Hartford. After the show closed on Sunday members of the club collect all of the discarded and leftover flowers from the exhibits for these arrangements.
Changing leaves signal that the growing season is winding down. Here are fall gardening tips for what you should do to prep your landscape for colder months.
Deal with fallen leaves. Turf grass won’t tolerate thick layers of leaves well. If you don’t have a lot of leaves, skip raking and mow over them to chop them into smaller pieces that will add nutrients to the soil.
Seed or lay sod. Cool temperatures combined with late fall rain make for ideal conditions for establishing new lawns or repairs in most regions.
Aerate your lawn.Plan to aerate high-traffic areas annually to loosen compacted soil; otherwise, every 2-3 years will do.
Keep up with weeds. Dandelions, clover, and other common lawn weeds will start proliferating as the temperatures cool off in fall.
Raise your mower blade. Keeping your lawn taller will encourage more root growth, which helps your grass survive the winter better.
Prep the Perennial Garden
Perennials are garden workhorses. After a long growing season, they’re ready for a winter rest. Stop deadheading in early fall and leave the above-ground parts standing even after frost kills them (unless pests and diseases are an issue). They’ll provide both food and shelter for wildlife. Songbirds will enjoy the seed buffet, and many pollinators like native bees overwinter in standing stems and brush.
Complete the following tasks in your perennial garden in the fall:
Remove weeds.Clear away as many as possible now so you have fewer to deal with next spring.
Add mulch. After the ground freezes, add a 4- to 5-inch-thick layer of bark mulch over the crown of perennials planted this growing year and those that are frost-tender in your area.
Plant spring-blooming bulbs. Tulips, daffodils, and many other spring-blooming bulbs are best planted in late September or October.
Dispose of diseased or pest-ridden plants. Remove any leaves, stems, and whole plants with diseases or bugs to reduce problems the following year.
Water once a week if dry. Even though perennials are going dormant in fall, their roots are still actively growing until the ground freezes. Well-hydrated plants withstand winter stresses better.
Refresh Your Vegetable Garden for Next Year
Whether you have an elaborate kitchen garden or a small patch for raising edible plants, things will start to slow down in the fall as you harvest the last of your tasty bounty. Once a few frosts finally bring the growing season to an end, check off these vegetable garden chores to prepare for next season’s harvest.
Clean out beds. Removing all plant debris helps prevent pests and diseases from overwintering in your garden and returning even worse in spring.
Put away stakes, labels, and other accessories. As you remove plants, don’t forget to gather items such as labels, stakes, and cages. Store them where they’ll be handy to reuse next year.
Add compost. Spread a 2- to 3-inch-thick layer of compost over your beds to enrich the soil. No need to till it in; precipitation and soil organisms will do the job for you.
Plant cover crops. Sow cover crops like mustard, peas, or clover in the fall to prevent erosion. Then turn them over into the soil in spring to add nutrients.
Expand planting areas. If you’d like to increase your planting space, fall is an excellent time to set up new raised beds or smother grass where you want to create an in-ground bed.
Care for Trees and Shrubs
Did you know fall is an excellent time for planting trees and shrubs? This is when you should start that new hedge or establish a new shade tree in your yard because the soil is still warm enough for roots to grow a little before winter. In addition, a little fall care for your established trees and shrubs will help them weather the colder months better.
Follow these fall gardening tips for trees and shrubs:
Plant new trees and shrubs. Add deciduous trees and shrubs until about a month before the ground usually freezes. You can also plant evergreen species in fall, but they tend to do better when planted in spring.
Provide plenty of water. Newly planted trees and shrubs—and established ones—will tolerate harsh winter conditions better when well-watered in fall. Likewise, extra water for evergreens is essential in fall.
Replenish mulch. Add a fresh layer of mulch, such as wood chips or shredded leaves, around trees and shrubs to protect roots from winter temperatures. Keep mulch from touching the trunks to prevent rot and other diseases.
Prune after dormancy starts. Trimming after September 1 will trigger tender new growth that’s easily damaged in winter. Instead, wait until leaves have fallen from deciduous species before pruning.
Guard trunks against deer and sun damage. Younger trees and shrubs can be ruined by deer rubbing antlers on the trunks. Plus, their thinner bark can be damaged by sun-scald. Using a tree wrap or guard in fall can prevent both issues.
Organize Your Tools and Gardening Gear
As the growing season winds down, don’t forget to prep your garden tools for winter. Cleaned and refreshed, your favorite garden helpers will be ready when you are, come spring.
Clean hand tools. Remove dirt, then place the metal ends of trowels, weeders, and other tools in a bucket of sand laced with vegetable oil.
Sharpen blades. Pruners and loppers can get dull with lots of use, as can shovels and spades. And don’t forget mower blades. Use a file to restore their sharp edges. Then coat with a bit of vegetable oil to prevent rust over the winter.
Drain hoses and irrigation lines. Before freezing weather sets in, remove any water from your garden hoses and irrigation tubing.
Prepare small engines. Drain gas lines of mowers, weed whackers, and tillers. Change oil as needed before storing machines in dry, covered spaces for winter.
Clean out sprayers. Empty and wash out your spraying equipment with soap and water, inside and out. Rinse and allow to air dry before stowing them away for the winter. And if you have leftover chemicals, store them in a safe place where they won’t freeze.
Clean Up Annuals and Containers
Colorful annuals are often the first plants to succumb to frosty fall weather. Once a hard frost does them in, you’ll want to tidy up planting beds and pots to be ready to fill again next spring.
Empty containers. The freeze and thaw cycle can crack containers, especially those made of clay left full of potting mix. After cleaning them out, store your pots and planters in a protected, dry area like a shed or garage.
Clean out flower beds. Once frost withers the zinnias, petunias, and marigolds in your garden beds, it’s time to pull them up so your planting space will be ready for new flowers in spring.
Collect and store seeds. You can save seeds of many kinds of popular annuals, such as celosia, petunia, cosmos, and nasturtium. Place each type of seed in a labeled envelope and stash them in a cool, dry place until sowing them in spring.
Dig up tender bulbs. Cannas, dahlias, caladiums, and several other tropical bulbs and tubers will not survive winter in northern regions. Dig them up shortly after the foliage turns brown in fall and store them in a cool, dry place for planting outside next spring.
Take cuttings to grow indoors. Snip sprigs of flower bed and container favorites such as coleus, geraniums, and sweet potato vine before temperatures get below 50˚F. They’ll root easily in water, providing a little indoor winter color. You can even keep them going long enough to plant outside again in spring.
Wow!! That’s a lot of work! But it will make your life in the spring much easier!
Instead of raking up or blowing all the leaves off your lawn, mow some of them. The tiny pieces resulting will be fertilizer to encourage a greener lawn next spring.
Recycle your discarded pumpkins, compost them or cut them into smaller pieces and leave in a wooded spot for wild animal treats.
Consider individual composting to help the climate. You can start composting your garden waste by having your own composter or subscribe to a company like Blue Earth who, for a monthly fee, will provide you with a container which they pick up weekly and repurpose it into fertilizer. They will give you back several bags of the fertilizer each year.
Check with your town about whether they collect kitchen scraps. In Glastonbury there is a container at the New London Turnpike transfer station where residents can dump their scraps, at no fee, as long as they have the necessary town dump permit. The collection is sent to Southington where it is processed into bio-fuel.
Glastonbury plans to add a Blue Earth Container for residents to dispose of kitchen waste. Current plans are to place the container behind Town Hall in April of 2023.